
If you've been exploring custom apparel printing, you've likely encountered DTF transfer printing. It's the technique that lets you print vibrant, full-color designs onto almost any fabric, from cotton to polyester and blends, without the prep work of screen printing or the limitations of vinyl. But what exactly goes into a flawless DTF transfer? In this guide, I'll walk you through the entire process, sharing practical tips I've learned from countless hours of printing. Whether you're a hobbyist or a small business owner, mastering DTF can open up a world of creative possibilities.
What Is DTF Transfer Printing?
DTF stands for Direct to Film. It's a printing method where your design is printed onto a special PET film using a DTF printer and water-based pigments. While the ink is still wet, a thermoplastic powder (often called hot melt adhesive) is applied. After shaking off the excess, the film is cured, and the design is ready to be heat-pressed onto a garment. The result is a soft, stretchable, and durable print that adheres beautifully to fabrics.
Unlike DTG (Direct to Garment), which requires pretreating and works best on cotton, DTF transfers can be applied to nearly any material, including nylon, leather, and even treated wood. This versatility makes it a favorite among crafters and apparel decorators.
Essential Supplies for DTF Printing
Before you dive in, gather the right tools. Here's what you'll need:
- DTF printer (or a modified inkjet printer with DTF ink and film)
- DTF film (PET film with a special coating)
- DTF ink (CMYK plus white)
- Hot melt powder (TPU adhesive powder, typically 80-200 microns)
- Heat press or curing oven
- Heat-resistant tape
- Lint-free cloth and scissors
Investing in quality supplies is crucial. Cheap film can cause ink bleeding, and low-grade powder may lead to poor adhesion or a stiff feel.
Step-by-Step DTF Transfer Process
1. Design Preparation
Start with a high-resolution image. DTF printing captures fine details well, but pixelated graphics will look muddy. Use design software to mirror your image horizontally because you'll press it face-down onto the fabric. If your design has white areas, the printer will lay down a white ink base automatically, but ensure your design file has a transparent background for best results.
2. Printing the Transfer
Load your DTF film into the printer with the coated side facing the print head. Send your design to print. The printer will first lay down white ink, then CMYK colors on top. This order is critical: the white ink acts as an opaque base, allowing colors to pop on dark fabrics. After printing, the film will have a wet, glossy appearance.
3. Applying the Powder
While the ink is still wet, generously sprinkle hot melt powder over the printed area. You can use a powder shaker for even distribution. Then, lift the film and gently shake off the excess powder. You want a uniform layer adhering to the wet ink, but no clumps. A common mistake is applying too much powder, which can result in a rough, plastic-like texture after curing.
4. Curing the Powder
Curing melts the powder into a smooth, adhesive layer. You can use a curing oven at around 320°F (160°C) for 2-3 minutes, or a heat press with low pressure for 30-60 seconds. The powder should turn from a matte white to a glossy, gel-like state. Overcuring can make the transfer brittle, while undercuring leads to poor washability. I recommend using a laser thermometer to verify the temperature.
5. Heat Pressing onto the Garment
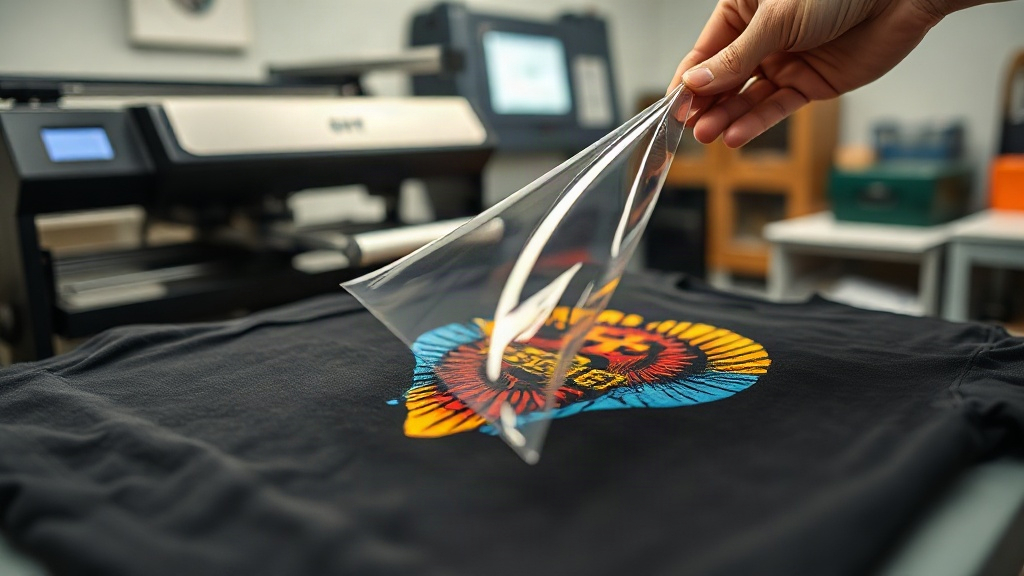
Preheat your heat press to 320°F (160°C). Place the garment on the platen, smooth out any wrinkles, and pre-press for a few seconds to remove moisture. Position the transfer face-down onto the fabric. Cover with a Teflon sheet or parchment paper. Press with medium pressure for 15-20 seconds. For best results, peel the film while it's still warm (warm peel). If you wait until it's cold, the adhesive might stick to the film instead of the fabric.
Common DTF Printing Problems and How to Fix Them
Even experienced printers run into issues. Here are some troubleshooting tips:
- Ink bleeding or smudging: Ensure your film is compatible with your printer and that you're using the correct ink settings. Too much ink can also cause bleeding.
- Powder not sticking: The ink may be too dry. Print immediately before powdering, and avoid printing in low-humidity environments.
- Transfer peeling off after washing: This usually means undercuring or insufficient pressure during pressing. Increase curing time or pressure, and always follow the powder manufacturer's recommendations.
- Stiff or cracked print: Too much powder or overcuring. Use less powder and monitor curing temperature closely.
DTF vs. Other Printing Methods
How does DTF stack up against DTG, screen printing, and vinyl? DTF shines for small batches with complex designs. It doesn't require screens or setup fees, and it works on a wider range of fabrics than DTG. Screen printing is more cost-effective for large runs of simple designs, while vinyl is great for single-color text or numbers. For a versatile, all-around solution, DTF is hard to beat.
Tips for Long-Lasting DTF Prints
To ensure your prints survive dozens of washes, follow these care instructions:
- Wait 24 hours after pressing before washing.
- Turn the garment inside out.
- Machine wash cold, gentle cycle.
- Avoid bleach and fabric softeners.
- Tumble dry low or hang dry.
- Do not iron directly on the print.
With proper care, a well-made DTF transfer can last as long as the garment itself.
Frequently Asked Questions
Can I use DTF transfers on dark-colored shirts?
Absolutely. DTF printing uses a white ink base that makes colors vibrant on dark fabrics. Just ensure your design has enough white layer, and the printer settings are correct.
What fabrics work best with DTF?
DTF adheres well to cotton, polyester, cotton-poly blends, nylon, and even leather. It's not recommended for fabrics with a heavy silicone coating or waterproof treatments, as the adhesive may not bond properly.
How do I store unused DTF transfers?
Keep them in a cool, dry place, away from direct sunlight. Place them in a sealed bag or container to prevent dust and moisture from affecting the adhesive. Properly stored transfers can last for months.
Do I need a special printer for DTF?
You can buy a dedicated DTF printer or convert an Epson inkjet printer with DTF ink and film. However, dedicated printers are designed for the viscosity of DTF inks and often yield better results with less maintenance.
Is DTF printing cost-effective for small businesses?
Yes, especially for small to medium batches. There's no minimum order quantity, and you can print one-offs without wasting material. The cost per print is reasonable, making it a great option for custom apparel shops.
Final Thoughts
DTF transfer printing is a game-changer for anyone in the custom apparel industry. It offers unparalleled versatility, vibrant colors, and durability. While it has a learning curve, the tips in this guide will help you avoid common pitfalls and produce professional-quality transfers. Remember, practice makes perfect. So, fire up your printer, and start creating! If you have questions or want to share your experiences, feel free to reach out. Happy printing!