Georgia DTF is a growing method for transferring designs to fabrics, t-shirts, and apparel with speed, detail, and durability. If you are a beginner exploring garment customization, a direct-to-film (DTF) workflow can offer a flexible entry point without the steep learning curve of other printing methods. This guide centers on a step-by-step Direct-to-Film tutorial that demystifies the process, outlines essential supplies, and walks you from design to finished product. To support discovery, the piece references practical topics like DTF printing for beginners, DTF transfer steps, and how to DTF printing for clear, actionable guidance. Whether you are starting a small home project or testing first designs, you’ll gain confidence as you learn core concepts and safe, repeatable workflows.
Beyond this guide, the same concept can be described as a film-to-fabric transfer technique that uses a printable carrier sheet and heat-activated adhesive. In the broader family of garment decoration methods, the direct-to-film pipeline emphasizes heat transfer through a coated film rather than direct ink deposition on the fabric. This diffusion-friendly approach aligns with modern small-business workflows, enabling beginners to iterate designs quickly and scale once confidence grows. Other terms you might see include clear film printing with powder adhesion, hot-press transfer from a PET sheet, and color-ready underbase layering to achieve bright results. By framing the topic with these related phrases, you’ll improve search discoverability while keeping the core idea intact.
Getting Started with Direct-to-Film: A Beginner’s Guide to DTF Printing
Direct-to-Film (DTF) printing opens a flexible pathway for garment customization, allowing designs to be printed onto a clear transfer film before the image is moved to fabric with a heat press. This overview aligns with a practical Direct-to-Film workflow and mirrors what you’ll encounter in a typical Direct-to-Film tutorial. For new makers, understanding the basics helps you select the right equipment, materials, and settings so you can start producing high-quality transfers with confidence.
If you are exploring DTF printing for beginners, you’ll appreciate how the process balances image quality with accessible tooling and predictable results. The DTF workflow supports a wide range of fabrics and keeps learning curves manageable, making it a strong option for home-based projects or small side businesses. This overview introduces the core steps you’ll practice as you master the Direct-to-Film tutorial and build a reliable routine from design to finished transfer.
Georgia DTF Beginners Guide: Setting Up Your First DTF System
A successful Georgia DTF setup starts with a clearly defined toolkit: a printer capable of white underbase printing, PET films or DTF transfer sheets, suitable inks, a powder adhesive, a curing or drying area, and a heat press. You’ll also need design software, masking materials, and heat-resistant tape to stabilize the transfer during pressing. This foundation mirrors what you’d expect in a Georgia DTF beginners guide and gives you a practical path from unboxing to your first test print.
For beginners, starting with a compact, entry-level package is common, with gradual upgrades as you gain confidence. Following a structured Georgia DTF beginners guide helps you avoid common pitfalls by establishing a consistent workflow, practicing with simple designs, and gradually tackling more complex artwork. This approach keeps costs predictable while letting you build real-world skills in the Direct-to-Film tutorial sequence.
DTF Transfer Steps and Color Management for Solid Results
Color management is a critical area where beginners can improve outcomes in any DTF project. By calibrating both the monitor and the printer, you align what you see on screen with what prints on fabric, a principle emphasized in many Direct-to-Film tutorials. In the context of Georgia DTF, accurate color reproduction influences customer satisfaction and repeat business, so you’ll want to test color fidelity on similar fabrics before a full run.
Understanding DTF transfer steps also means recognizing how underbase strength, color layering, and fabric type affect the final transfer. As you fine-tune profiles and ink densities, keep a simple log of successful settings for different fabrics. This practice supports the longer-term goal of consistent results and aligns with the core ideas in the Georgia DTF beginners guide, helping you deliver crisp edges and vibrant colors across projects.
How to DTF Printing: A Step-by-Step Workflow from Design to Transfer
How to DTF printing starts with preparing your design in software, ensuring color profiles are appropriate, and sizing artwork for the garment. This is the first step in a practical workflow often demonstrated in the Direct-to-Film tutorial, where you mirror the image before printing to accommodate film flipping during the press. By following these steps, you establish a reliable base for a smooth transfer process.
The step-by-step workflow continues with printing on the DTF transfer film, powder application, curing, garment pre-press, and precise alignment on the press. Completing the process—peeling the film after pressing and allowing the print to cure—reflects the typical cadence of DTF transfer steps. As you gain experience, you’ll learn how different fabrics respond to temperatures and dwell times, reinforcing the value of the Direct-to-Film tutorial as a practical guide.
Maintenance, Safety, and Quality Control in DTF for Beginners
Maintenance and safety are foundational to successful DTF projects for beginners. Regularly cleaning printheads, checking the curing area, and storing powders properly protect your equipment and the final transfers. This emphasis on safe practices aligns with how to start DTF printing safely and efficiently, ensuring your Georgia DTF setup remains reliable as you grow your DIY printing work.
Quality control is the final hinge—inspect each transfer for flat film, even powder coverage, and correct garment pre-pressing. Keep a log of successful settings and fabrics to reproduce consistent results in your DTF printing for beginners journey. By combining careful maintenance, adherence to safety guidelines, and systematic checks, you’ll steadily improve durability and color fidelity in your transfers, reinforcing the core ideas found in the Georgia DTF beginners guide.
Frequently Asked Questions
What is Georgia DTF and how does the Direct-to-Film tutorial help beginners?
Georgia DTF is a method for transferring designs to fabrics such as t-shirts with speed, detail, and durability using a direct-to-film workflow. The Georgia DTF Direct-to-Film tutorial guides beginners through essential supplies, setup, and each stage—from design to finished transfer—so you can build confidence and master DTF printing for beginners.
What equipment do I need for DTF printing for beginners using Georgia DTF?
A beginner DTF printing setup typically includes a printer capable of white underbase printing, DTF transfer sheets, DTF inks, an adhesive powder, a curing or drying area, and a compatible heat press. You’ll also need design software, masking materials, heat-resistant tape, and a reliable workflow; start with a well-supported Georgia DTF beginners guide to stay aligned with the Direct-to-Film workflow.
What are the DTF transfer steps in the Georgia DTF workflow for beginners?
Key DTF transfer steps include: 1) design and mirror the artwork; 2) print the design on the DTF transfer film with white underbase; 3) apply and cure the adhesive powder; 4) pre-press the garment to remove moisture; 5) align the transfer and press with heat; 6) peel and finish the print. Following these DTF transfer steps within the Georgia DTF workflow helps ensure a clean, durable result.
How to DTF printing: a Georgia DTF beginners guide—what should beginners know about color, fabrics, and safety?
Focus on color management by calibrating your monitor and printer and using proper color profiles. Georgia DTF supports cotton, cotton blends, and poly blends, so test on similar fabrics and pre-press to minimize texture show-through. For safety, work in a ventilated area, follow manufacturer guidance for inks and powders, and wear protective gloves when handling powders or hot surfaces.
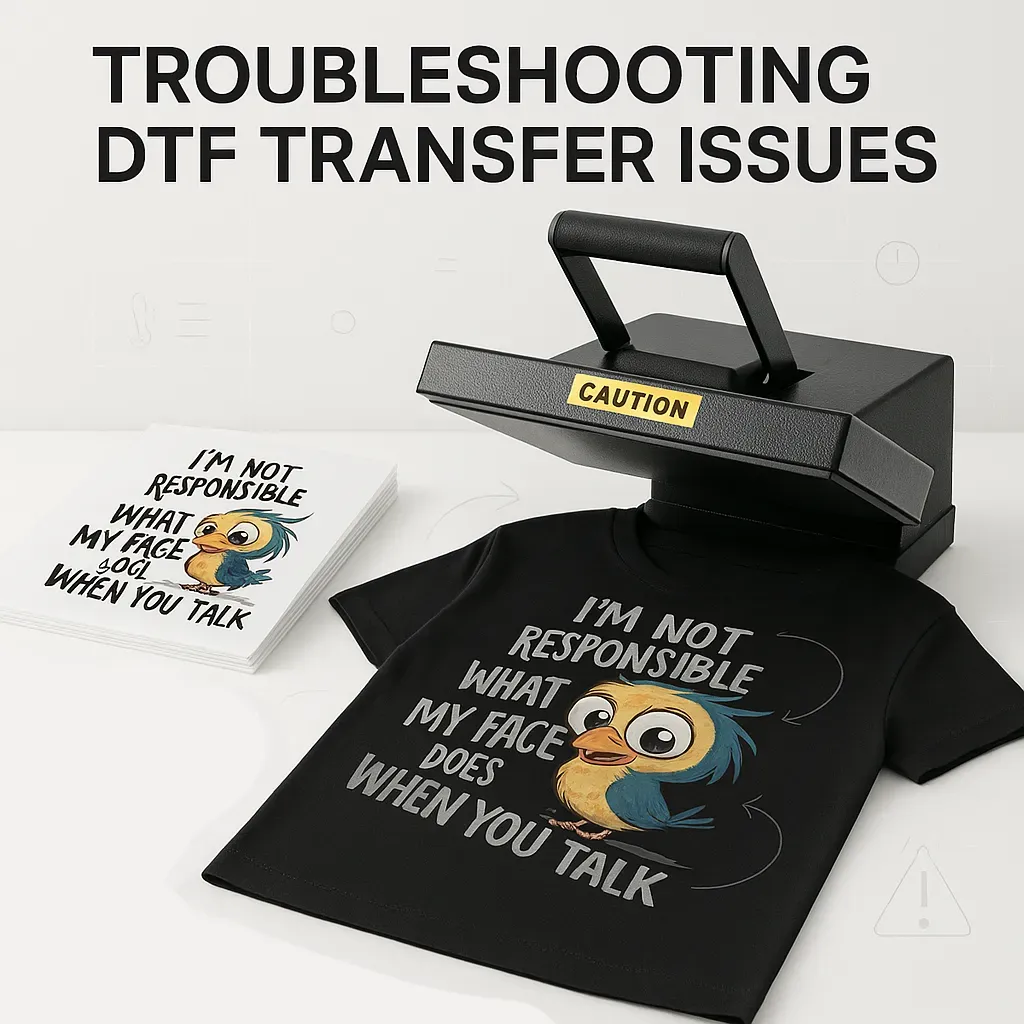
What common issues might occur and how to fix them during the Direct-to-Film tutorial in Georgia DTF?
Common issues include dull colors, blurry images, and powder adhesion problems. If colors wash out, adjust the color profile or ink density; if the image is blurred, check resolution, ensure the film lies flat, and confirm proper pre-press; if the powder doesn’t adhere, review curing temperature and distribution. Always run a small test print to iterate within the Direct-to-Film tutorial.
| Topic | Key Points |
|---|---|
| What is Georgia DTF? | Growing method for transferring designs to fabrics, t-shirts, and apparel with speed, detail, and durability; beginner-friendly with a flexible entry point. |
| Why it’s good for beginners | Offers image quality, balanced cost, and ease of use; flexible DTF workflow suitable for home businesses or experiments. |
| Core workflow | Print on clear film, apply adhesive powders, then transfer with a heat press; compatible with cotton, cotton blends, and poly blends. |
| Setup components | Printer with white underbase capability, PET films, DTF inks, adhesive powder, curing/drying area, heat press; design software, masking materials, heat-resistant tape; beginner kits available. |
| Design & prepress | High-resolution artwork, proper sizing, mirrored image, bold outlines for readability; pre-press garment to remove moisture for smooth transfer. |
| Equipment & materials | DTF printer, transfer films, heat press, powder shaker, lint roller, heat-resistant tape, temperature-controlled heat source, curing area; film holds artwork; follow manufacturer guidelines. |
| Step-by-step outline | Seven steps: prepare design, print, powder, cure, prepare garment, align and press, peel and finish; maintain timing and temperature control. |
| Color management | Calibrate monitor and printer; align color profiles with reality; test on similar fabrics; manage underbase and color layering for dark fabrics. |
| Quality control | Inspect transfers for texture, edges, and color; check film flat, powder distribution, and pre-pressed garment. |
| Troubleshooting | Address washed-out colors, blur, or powder adhesion by adjusting color profiles, printer settings, film flatness, and pressing technique; keep a settings log. |
| Maintenance & safety | Clean printheads, check curing area for dust, store powders properly; work in a ventilated area and use protective gear as needed. |
Summary
Georgia DTF is a practical, scalable method for transferring vibrant designs to fabrics and apparel, delivering speed, durability, and high image quality. This descriptive overview outlines the core concepts, from essential supplies and setup to a step-by-step workflow, color management, quality checks, and maintenance. By following the Georgia DTF beginner guide and practicing with simple designs, you can build confidence, minimize waste, and grow a small home-based apparel project into a reliable, repeatable process. Maintaining mirrored artwork for printing, even powder application, and consistent pressing conditions are key to durable transfers that wash well and endure wear.